Tuesday, August 31, 2010

Fair Trip Pictures


Hi Everyone--
  My craft room is a work in progress.  My DH has been helping me put together organizational furniture as well as hang shelves so I'll be more organized in there.  Tonight I most likely won't be crafting, I'll be putting things away, so I thought I'd share a couple pictures from our trip to the Fair this past weekend.
  Thank you to all of my new followers for following me and taking the time to comment on my blog!! I love comments.  I hope to spend some time this weekend cruising some of the new blogs I'm following as well and leave my comments.  :)
  Tomorrow I'll have something crafty for you all.  In the mean time, enjoy the pictures!!

Happy Stampin!
Amy

Alex--on the bus, excited for the Fair

Jack (my youngest) excited to be on the bus!
My family just inside the Fair gates
My sister and her boyfriend
Alex and Grandpa (my Dad) at their first stop--the water ride
Jack's first cheese curd ever--he loved it
Jack wasn't so sure about the animals, but when Alex showed him it was ok

Monday, August 30, 2010

Neutrals....


Hi Everyone,
  I hope you all had a good weekend!  Ours was busy but nice.  As I had said in my previous post, we went to the MN State Fair.  I have some pictures I'll be sharing with you in the next day or so.  The boys had a great time!  My parents were nice enough to take them back to their house when they'd had enough Fair so my husband and I could have a little more time to look at stuff.  Our favorite thing?? Wine tasting.  Did you know Minnesota has wineries?  I really liked the Raspberry Wine from Winehaven and Sippin from a Slipper (a sweet white wine) from Glacial Ridge Winery.
  Anyways--the real reason you are here, a card!  This one I made last winter on a girls' weekend with some of my friends.  I sometimes forget how much I like the feeling of a neutral color palette.  This card uses Basic Black, Sahara Sand, and Chocolate Chip.  Stamp sets used are Medallion (LOVE) and Vintage Vogue.
  Thanks for stopping in!  I completed my first design challenge sample tonight.  I can't wait to share it with you on September 7th.  If you haven't yet, stop over at www.suochallenges.com and check us out.  And, if you have, stop again--make sure you are signed up to follow us so you get all the updates when something posts, AND, our pictures are up now so you can see what we all look like.  Thanks for checking in!

Happy Stampin~!
Amy

Thursday, August 26, 2010

The MN State Fair


Hi Everyone--
  One of our end of the summer traditions as a family is going to the "great MN get together" also known as The MN State Fair.  This weekend I won't be blogging as we will be enjoying our time together at the Fair.  My older son is very excited for his traditional ride on the giant slide with Grandpa Dave (my Dad).  My younger son doesn't know what to expect because last year was his first Fair, and he was only 6 months old.  My husband and I are excited to see what tickles the boys' fancy, to try some of the new Fair foods (like Korean BBQ Tacos, and Mashed Potatoes on a stick) as well as to enjoy some old favorites like Cheese Curds, Pronto Pups, and Sweet Martha's Cookies.
Mitch and I visited the Oink Booth--State Fair 2009

   All the while we will be documenting this year's trip with pictures.  They will eventually find their way in to a scrapbook, which will eventually find its way here.
  Thanks for checking in--I hope you all have a great weekend, and get to enjoy some time with your loved ones, too.

Happy Stampin!
Amy


Seasons Greetings


Hi Everyone--
  Today I have the last of my swap cards to share with you.  I love how this one turned out.  It's kind of cutesy, old-timey....is that a style??
   I started out with a base of Real Red, I layered it with a 1/4" smaller layer of Whisper White.  To the edge of that I used a strip from the Candy Cane Christmas designer series paper and to that I added a strip of Baja Breeze decorated with the Eyelet Label punch.  I used the adorable ornaments and Christmas trees from the new set A Cute Christmas, the greeting comes to you from Four the Holidays in the IB&C.  The images on this card took me back in time a little bit, it reminded me of a family run tree farm where you get to go pick out "the perfect tree".  Ones I remember from growing up had the pre-cut Christmas trees under some hand strung Christmas lights--that's kind of what the ornaments above those happy little trees on this card reminded me of.   I love the holidays--I am looking forward to them this year.
  We do an artificial tree at our house, but we are looking for traditions to do with our boys.  One we have is that on Christmas Eve the boys open their new jammies, so they have new Christmas jammies on in the Christmas morning pictures.  They also get to open their new ornament to put on the tree on Christmas Eve  My mom used to do that with my sister and I when we were kids, and, she still usually gets us new pajamas as one of our Christmas gifts even though we are grown now.  We also still get an ornament.  I love that.  (Thanks Mom!!)  Are there any special traditions you do with your families for the holiday season?  I'd love to hear what they are.  Thanks for checking in!

Happy Stampin!
Amy

Wednesday, August 25, 2010

Grateful


Hi Everyone--
  I don't often do cards for Thanksgiving.  The colors in this card said Thanksgiving to me, along with the hemp twine.  I think you could also use this card for a Thank You card.  I really love the colors associated with Thanksgiving and Fall, and am looking forward to using both this wheel and stamp sets in other projects.
  For this card I used textured Early Espresso card stock as the base and it's layered with Pear Pizzazz, Daffodil Delight, and Cajun Craze.   I ran the Bright Blessings jumbo wheel along a stirp of Very Vanilla cardstock.  Around this layer I wrapped a piece of hemp twine that I strung one of the beautiful new Neutral buttons on and tied a knot.  I stamped the word Grateful from the Falling Leaves set (in the Main Idea Book and Catalog) and punched it out with the Modern Label punch.  I attached it to the base of the card with a dimensional to pop it up a little bit.
  Thanks for stopping in!!  What kinds of things do you create for Fall/Thanksgiving?  Stop back tomorrow for a Christmas card.

Happy Stampin!
Amy

Tuesday, August 24, 2010

Spooky


Hi Everyone--

 Today I have a Halloween swap card to share with you.  I sent this card, along with a Thanksgiving card and a Christmas card, out in the mail this week for a swap.  All of these cards feature either something from the Holiday Mini card or new product.  I'll share the others later this week.
  For today's card I used Basic Black card stock as my base, layered with two designer series papers.  The background is the Newsprint and the black patterned paper is from Love Letters.  I will be stocking up on these two papers because they are SO versatile.  The new product featured is the stamp set Dark and Dreary--I love this set, it has some great haunted house type spooky images.  The saying "Spooky"is from the Wicked Cool set also new in the mini.  This set has a great witch hat and boots that I can't wait to use, too.  I also used the new 1/2" Raven lace trim and the extra large Decorative Label punch.  These will be a MUST have from this mini.  The Decorative Label punch is such a classy punch, and the lace trim is going to be fun for Valentine's Day cards as well.  
  Did you all get your holiday minis in the mail?  I'd love to hear what your favorites are.  Well, it's off to bed for this crafty lady.   Hope you all had a good day!  Thanks for checking in.

Happy Stampin!
Amy

Saturday, August 21, 2010

Tags, Tags, and More Tags

Hi Everyone!!
  Tonight I have not one, but TWO original creations for you. AND....a sneak peek from the new Holiday Mini!!! I am participating in a Tag Swap, and these are my contributions.  I have an adorable snowman from the set in the holiday mini called Tags 'Til Christmas.  This is a GREAT set.  All of the images included in this set are able to be punched out and decorated however you like.    What a fun get together with you and some girlfriends making some tags for the upcoming holidays!  For my snowman tag I used the color combo of Whisper White, Marina Mist, and Real Red.  I used the 1/8" Marina Mist taffeta ribbon (love!!), the Two Tags die cut for the Big Shot, and the 2 & 3/8" scallop Circle, and the 1 & 3/4" circle punches.  I used Marina Mist classic ink, and colored his scarf with my Real Red marker and his hat with my Basic Black marker.  I finished it off with some Dazzling Diamonds glitter to make it look like snow.  Here's the finished product:

Now...tags aren't just for the upcoming holidays.  We need them for all sorts of things.  Birthdays, Baby Showers, Wedding Showers, Weddings,  a Welcome gift to a new neighbor or co-worker, perhaps a little Thank You...there are tags for all kinds of things.   So, my second tag I am contributing is a Congratulations tag for a baby girl.  I just have boys, so it was fun to ink up some pink.  :)

For this tag I used the FABULOUS set in the Big Idea Book and Catalog called Perfect Punches.  Again, a punch for every tag in the set, and a nice variety of sayings to use.  My sentiment is Congratulations, and it features the Modern Label Punch.  (LOVE this one...I use it all the time)  This is a classy punch that looks great by itself or layered up with the Word Window Punch.  It also looks fun with the Curly Label Punch behind it.  Lots of ways to dress it up if you wish, but as I said, great by itself.  I used the Two Tag die cut again, and the scallop and circle punches.  My color palette was Early Espresso (my new neutral love), and the In-Color Blushing Bride along with Whisper White.  I used the Jumbo Wheel called Baby Tees.  This is such a cute wheel with great coloring options for boy or girl, or to go with a neutral scheme.  I wheeled the wheel a few times in Early Espresso, cut out the onesies with my paper snips and colored them in with my Early Espresso and Blushing Bride markers.  Piece of cake.   Here's the finished product on this one:
I'd love to know what you think of my creations.  They are going out in the mail on Monday.  Tomorrow I'll be back with more swaps I'm creating for a Halloween, Thanksgiving, and Christmas swap.  Thanks for stopping!  Leave me a comment and let me know what you think.

Happy Stampin!
Amy

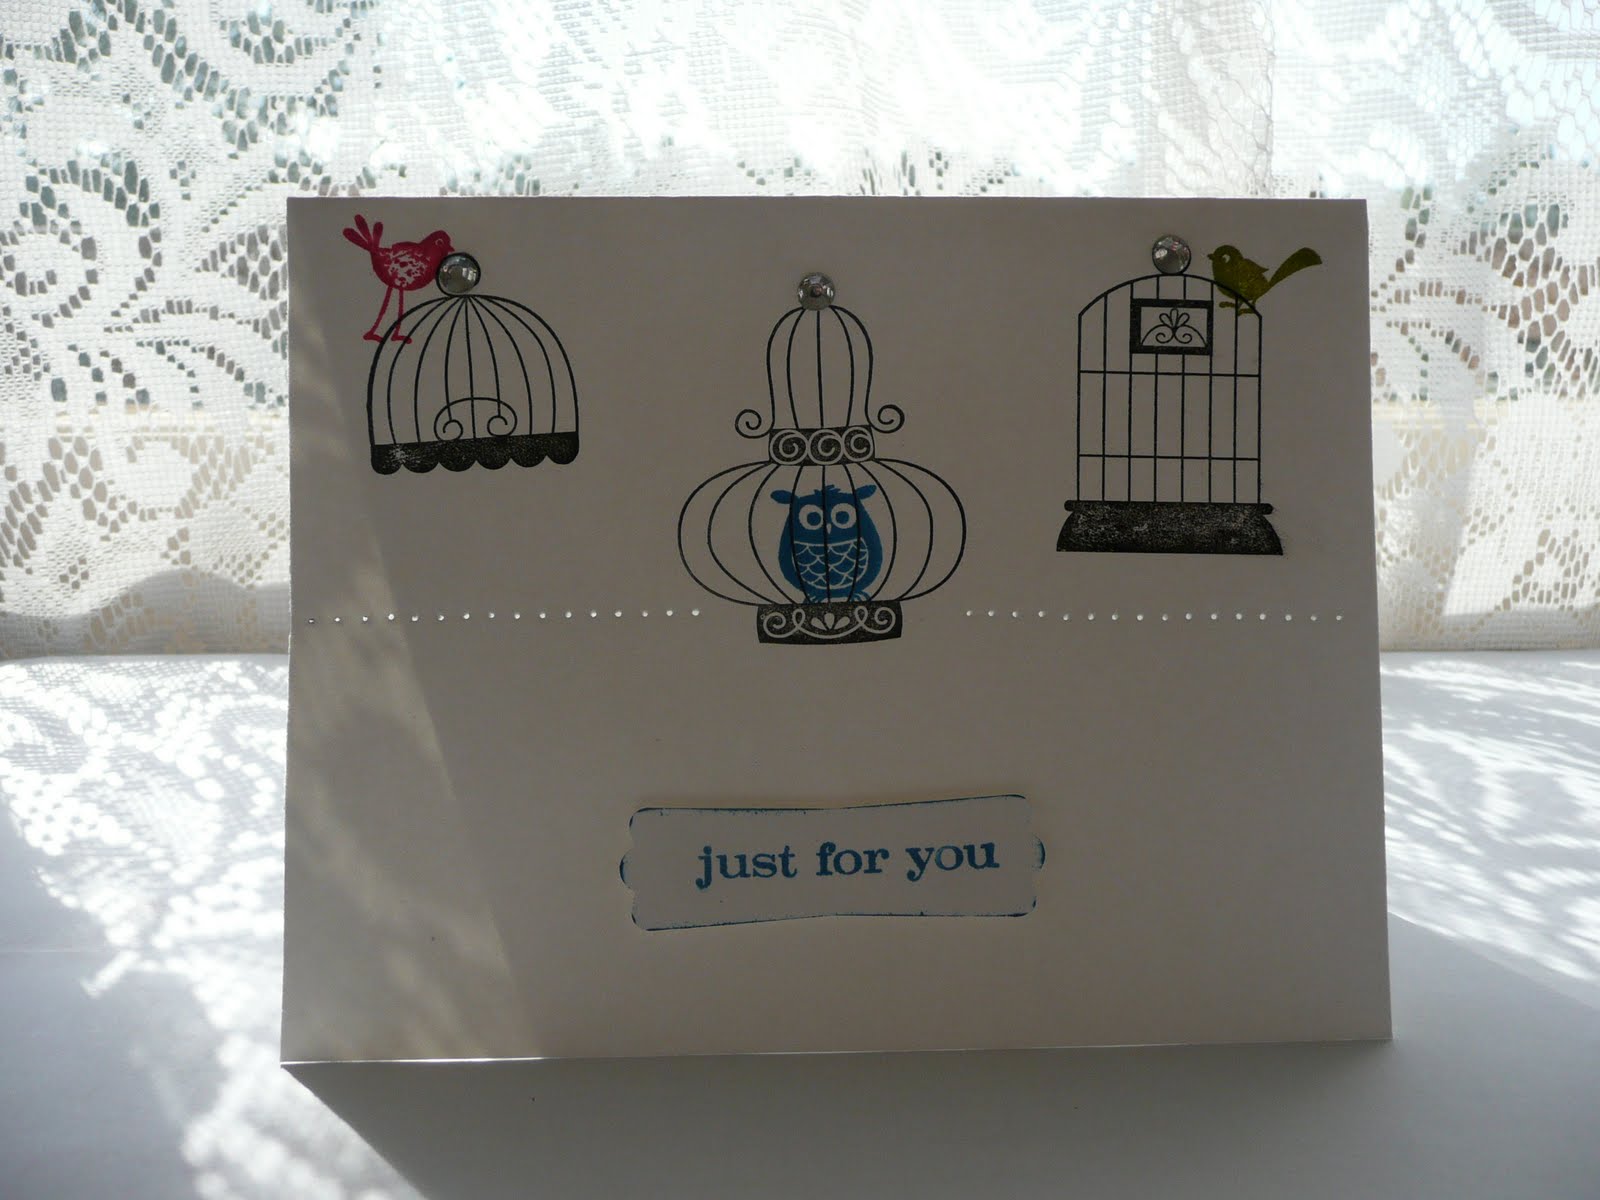
PS...here's a picture of the two of them together

Wednesday, August 18, 2010

Brand New Challenge Blog Coming Soon....

Hi Everyone!
  As the title says, I just wanted to tell you that I was chosen to be a design team member of a Stampin Up Only Challenge Blog.  Our first challenge will post on September 7th.  I'd love for you to check out the blog, and play along with us.  Each challenge we will choose three winners and they will get a special blog badge for playing along with us.  I would love to see you there!! The site's address is: http://suochallenges.com/
  I had my first stamp club meeting last night--it went great!!  I'm already looking forward to next month.  I am also working on organizing my reclaimed craft space, so I haven't had a whole lot of time for creating things to show you this week.  I plan to do some more crafting this weekend, possibly tomorrow night, and so I'll have an original design to share with you then.  Until then...how about some more Convention eye candy??
  Thanks for checkin in--check out the challenge blog, I'll be looking for you!!

Happy Stampin!
Amy
 A pillow made with flowers cut from the Big Shot dies.
 A lampshade done with ribbons, buttons and Big Shot flowers.
An Evening to Remember Stamp Event-Jackie Barfield (Hi Jackie!!), Jaron Winder (Hi Jaron!!), and me.  It was a really fun night!

Thursday, August 12, 2010

A Happy Haunt

Love the way these white pumpkins look with the black
The same cute Christmas house spooked out as a Halloween Haunt...


Hi Everyone!
   Back with some more pictures from Convention.  This time, for Halloween, which, with the start of school approaching will be just around the corner.  Here again is that Decor Accent Build a House that I featured in my last post as a cute Christmas Cottage.  This time, it is featured as a spooky haunted house. I LOVE these houses and can't wait to get my hands on them.  They will look so cute as a feature on my console table, and I am totally going to make a black garland to go with them.
  I gotta run--we were at a birthday party for a friend of my 8 year old.  It was a blast, but I'm beat.  Sounds like the hot humid weather we've been experiencing around here is going to be leaving us after tomorrow.  Hope so....maybe I'll get some of my energy back.  Saturday I'm spending some time just crafting, so I'll be back with some new stuff for you soon.   Hope you are enjoying the convention posts until then.  :)

Happy Stampin!
Amy

Wednesday, August 11, 2010

One of my favorite things from Convention

Hi Everyone--
  I don't have an original creation for you all today, but I still have something fun.  This is a new product, actually several new products, from the upcoming Holiday Mini which debuts on September 1st.  I am SO excited about this new catalog, I think it's one of Stampin' Up's best minis yet.  This adorable little house is called a Decor Accents Design-a-House.  It comes with a template if you want to dress it up with paper, it is also able to be spray painted.  There is no limit to the creativity here.  They used some of the new Deck the Halls paper that will be coming soon, and the pretty paisley like curtains--a print from our new fabric line coming out with gold tinsel trim above the windows.  LOTS to be excited about in this upcoming catalog, there truly will be something for any kind of crafter.

One of the demonstrations showed this house all decked out for Halloween with black spray paint and chunky black glitter some spiders stamped on vellum in the windows and bats punched out of designer series paper using our new bat punch attached to wire.  Very spooky, yet cute all a the same time.  During this demonstration he put one together for us as well so we could see how easy it goes together.  All you need is some sticky strip to place along the seams and it goes together great.  It took him maybe five minutes to fold along the score lines and stick together.  

I still have some spots open for workshops this fall and winter, if you are interested in checking the Holiday Mini out for yourself, or joining my team of demonstrators, let me know.  Thanks for checking in.

Happy Stampin'
Amy

Tuesday, August 10, 2010

Monkey Business


Hi Everyone!
  Today I have a card for you that my boys gave my husband for Father's Day this year.  My boys, who have been featured on my blog some, are 8 and 18 months.  Most days it feels like we live with 2 monkeys.  (Those of you who have boys can probably relate)  They are loveable and fun and NONSTOP energy.  What better way to convey that than a fun home made polka dots pattern and the cute monkey image from Fox and Friends?   I am SO glad that this set carried over from the mini catalog to the new Idea Book and Catalog.  I LOVE this set.  Adorable animal images great for baby cards, little kid cards, scrapbook pages and even Father's Day!
  This card was a simple card to do and didn't take a whole lot of time.  I used Whisper White as my background and my 1 3/8" circle punch to punch out Real Red and Bashful Blue polka dots.  I attached them in a random pattern with snail adhesive and clipped the edges off to make them flush with the edges of the card.  The monkeys were stamped on a piece of Whisper White in Chocolate Chip Classic Ink, and then matted with a piece of Bashful Blue and Real Red cardstock.  Inside--a handwritten message (and scribble) from the boys.  This one goes in the "keep" pile.
  Check back.  I hope to be sharing a couple of holiday ideas, and later this weekend a scrapbook page and idea.  The scrapbook I will add to as time goes on, and will be featuring a lot of my little monkeys Alex and Jack.  Thanks for stopping in!

Happy Stampin!
Amy

Monday, August 9, 2010

Mid-Life Sports Car....

Hi Everyone :)
  Today I have a card for you that I made for my husband's birthday.  He hit the big 4-0 this year and here's the card I made for him.  He didn't go for a new sports car...just a brand new grill.  :)  I used the Modern Label Punch, the Medium and Small Oval punches and the 1/2" Circle Punch.  The little guy in the driver's seat and the presents in the back are from All in the Family and the cloud paper is from the Sale-a-Bration Welcome Neighbor pack.  I have a week of cards lined up for you all and will be including my items from Stamp Camp on Tuesday.   Happy Monday!

Sunday, August 8, 2010

Clean and Simple 102

Hi Everyone!
  Today I have a card I did for the Clean and Simple Challenge 102.  I got to play with my brand new set, Aviary.  It was on my wish list and when I did my holiday pre-order I had to add it in.  I'm glad that I did.  I love the variety of whimsical bird cages and cute little birds, especially the fat little owl.
   I used Whisper White cardstock as  my base, and Basic Black for each of my three birdcages.  I used Old Olive, Melon Mambo, and Pacific Point for the bird colors, and Pacific Point for the sentiment that also sits on the Modern Label Punch.  To give it a bit more interest I used my paper piercing tool along the bottom of the bird cages, and added a rhinestone at the top.
   Hope you enjoy!  I'll be back tomorrow with the 40th birthday card I made for my husband.

Happy Stampin!
Amy


Tuesday, August 3, 2010

Spoiler Alert

Hi Everyone!

First of all:

  If you are a member of my stamping club and DO NOT want to see the cute bag and bag tag you will be receiving at our meeting on Tuesday STOP READING!  


I recently attended Stampin' Up's Convention in Salt Lake City, Utah.  At Memento Mall, the store they have set up onsite with Stampin' Up merchandise available only to demonstrators that go to Convention*, these cute reusable shopping bags jumped out at me as a fantastic gift to my 10 club ladies.  Who doesn't love a reusable shopping bag, especially with such a CUTE print like this??  (*occasionally they will make some of the things available later to demos who couldn't attend)


Of course, I couldn't just give them the bag, I had to personalize it a bit.  So, I made a monogram bag tag for each of them using the Play Date designer series paper that I won at Convention.  The Play Date paper is what the bags were patterned after so they look like a matching set.  I ran the tags through my Big Shot using the Top Note die.  To make them a little more firm I used a piece of the cardboard that comes with each designer series paper pack that we buy.  I then used my XL Scallop punch (new in the Summer Mini), and my XL Circle Punch to create the flower that the initial goes on.  Using Basic Black ink I stamped the first letter of each of their names with the Lovely Letters set, and embellished with some retired play ground buttons.  I then tied these cute little tags to the bag with Tempting Turquoise grosgrain ribbon.  SO cute and easy.  Wouldn't these also be great for the kids for those backpacks when they head back to school?  Or on a bag that you give a thank you gift to a teacher or day care provider?
  That's all I have for you tonight.  I hope to be back tomorrow with a new creation for all of you.  Thanks for checking in!

Happy Stampin!
Amy